
The convenience, efficiency, and security of electronic signatures have made them a popular choice for document signings. However, amid this technological shift, some individuals still find comfort in the personal touch of a handwritten signature. They value the authenticity and unique flair it adds to a document.
Fortunately, technology has advanced to the point where a handwritten signature can be created online.
In this article, we will explore the process of creating a handwritten signature online, enabling you to reap the benefits of electronic signatures while keeping your personal signature style intact.
Different ways to create a handwritten signature online
To create traditional handwritten signatures, all you need is a pen and paper. But, when it comes to generating handwritten signatures online, you can use some of the methods mentioned below.
1. Scanning your signature image
You can scan your handwritten signature using a scanner or smartphone camera and save it as a .jpeg or .png image file. You can then upload this image to any document you need to sign.
2. Using a computer
To create a handwritten signature with a computer, use a mouse to draw your signature on a blank document, save it as an image file, and insert it into the document where needed.

3. Using a touch-screen device
Touch-screen-enabled gadgets provide a convenient way to draw your signature directly on the screen using your finger or a stylus. The signature is captured as a digital image. You can then save this image and use it to sign documents electronically.

4. Signature generator tools
A signature generator tool is a software or online service that allows users to create electronic signatures in different ways. Users can choose to type their name in various fonts and styles, draw their signature using a mouse or touchpad, upload an image of their handwritten signature, or even use pre-designed templates to create a signature. They can also change the size and color of their signature to match their preferences.

Whichever method you choose, it's important to ensure that your electronically generated signature is valid, secure, and meets all compliance standards. For instance, in the United States, e-signatures must satisfy the requirements of the federal Electronic Signatures in Global and National Commerce (E-SIGN) Act and applicable state Uniform Electronic Transaction Acts (UETA).
How to create a handwritten signature with LegalZoom
LegalZoom eSignature service allows you to sign documents electronically and provides you the option to sign them with your handwritten signature.
Follow these instructions:
1. Create an account
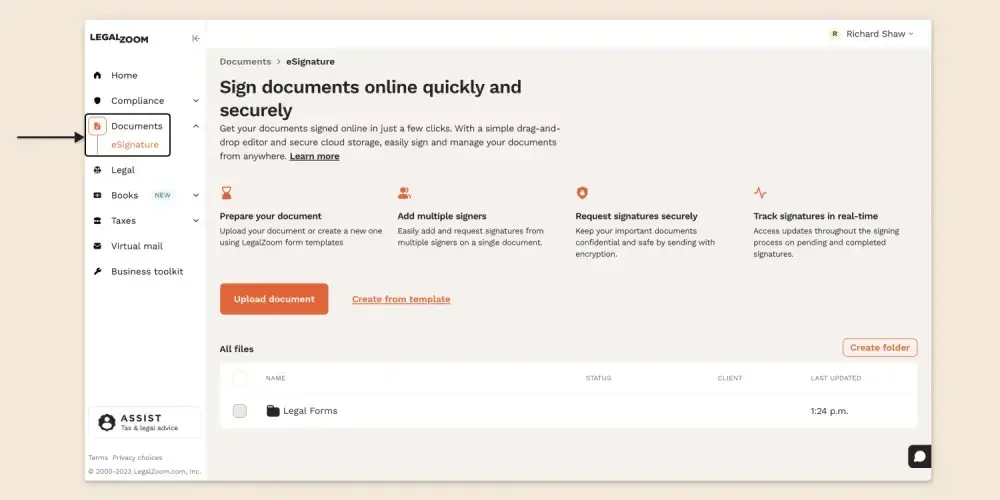
First, create an account to start using our eSignature service. After logging in, from the left navigation bar, go to Documents, and click eSignature under it.
 2. Upload a document
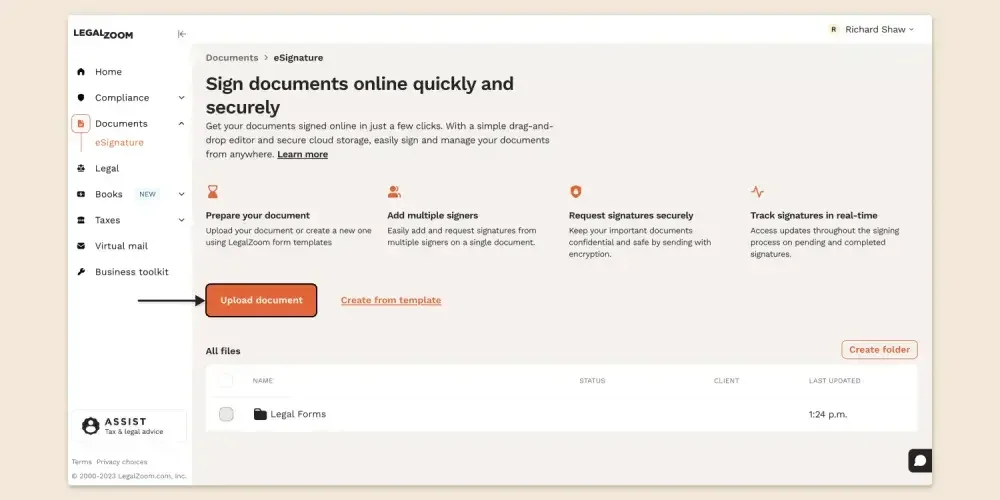
Upload the document that needs your signature. After uploading, the document automatically opens, and you can start reviewing it.
3. Add a Signature block
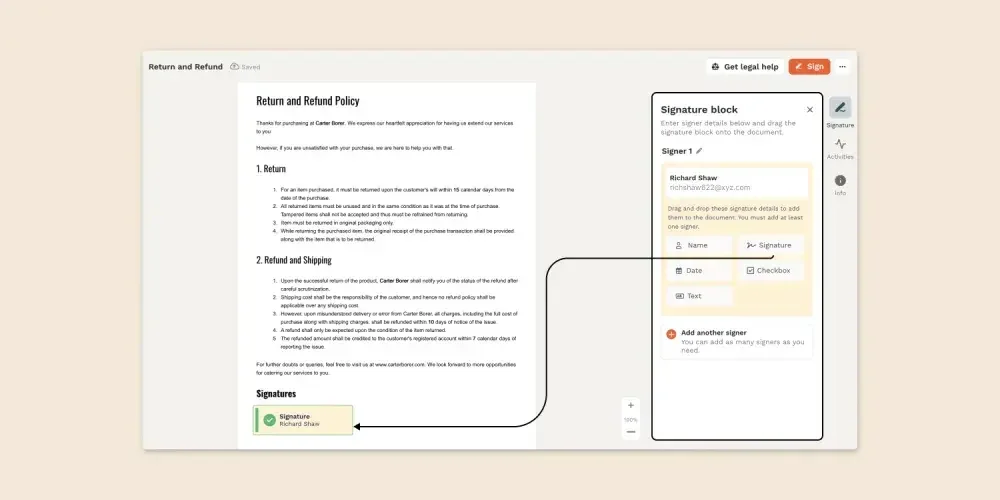
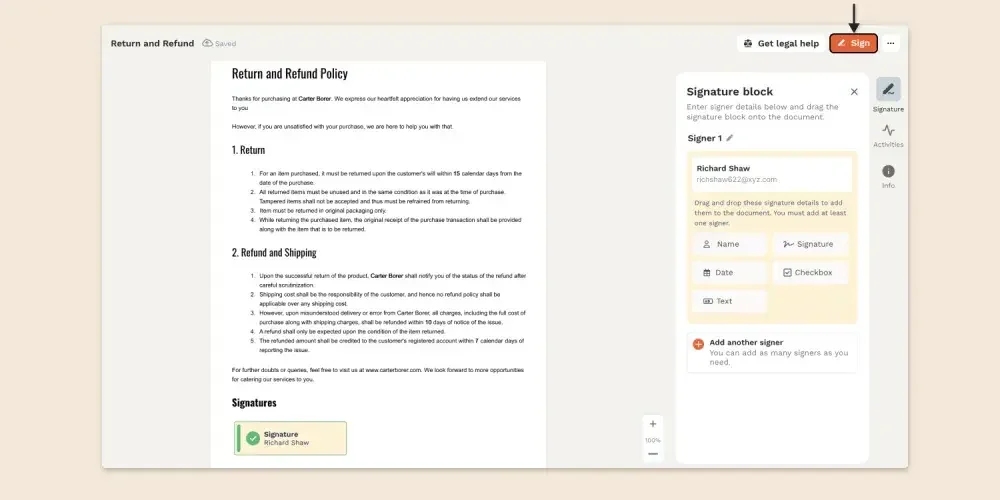
By default, a Signature block will appear on the right side of your document with your name and email ID already filled in the respective fields. To add your signature anywhere on the document, you need to drag and drop the Signature tag present in the block.
This will activate all the remaining tags in the Signature block: Name, Date, Text, and Checkbox. These tags act as information placeholders.
For instance, if you wish to have your name and signing date on the document along with the signature, you should add the Name, Date, and Signature tags. Likewise, use the Text tag to add any information on the document while signing. All these tags could be placed anywhere on the document with a drag-and-drop action.
In case you want to add more signers, all you've to do is click the +Add another signer button.
4. Send the document for e-signature
After you've added the necessary tags, send the document for e-signature with just a couple of clicks. In case you're the only signer in the document, you can proceed with the e-signature process in the same tab by clicking the Sign button.
5. Start signing your document
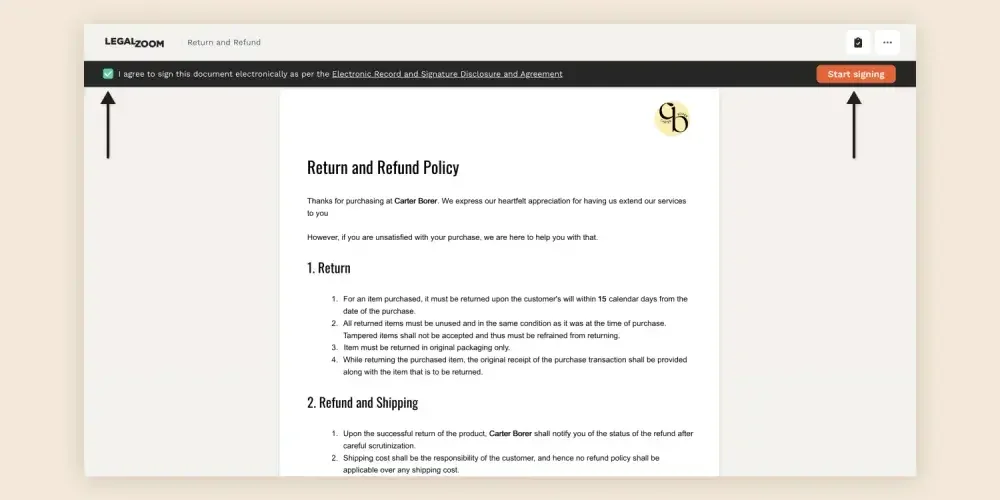
First, you need to agree to sign the document electronically. To do so, click the checkbox placed on top that says, “I agree to sign this document electronically as per the Electronic Record and Signature Disclosure and Agreement." Then, click the Start signing button.
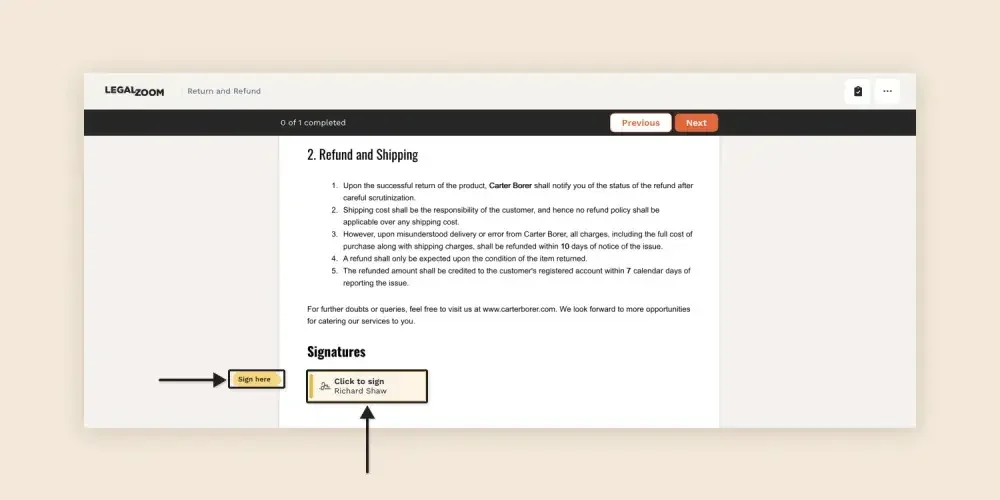
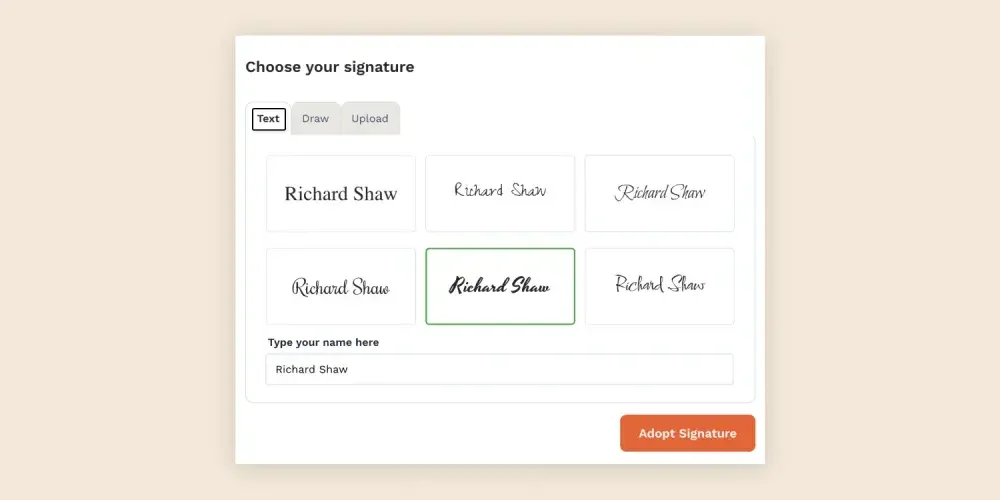
Once you fill in all the details, the Sign here label will directly take you to the signature tags placed in the document. Hit the Click to sign button. A window will pop out where you can choose to create your handwritten signature in different styles.
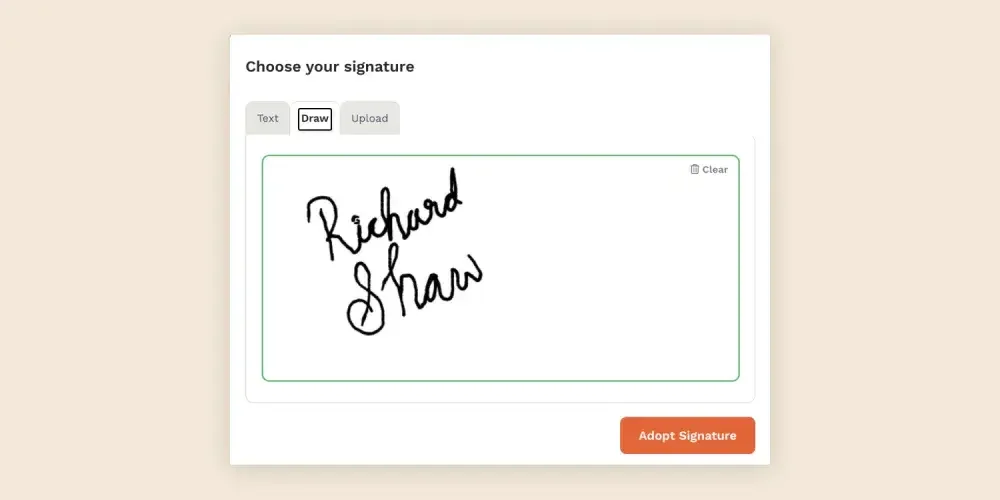
Draw: Experience the same satisfaction as signing with a pen on paper by effortlessly drawing your signature on a touchscreen with your finger or a digital pen. If you're signing from a computer, you can use a mouse to create your unique signature.
Text: In this signature style, you have the flexibility to type your name exactly as you want it to appear in your e-signature. Whether you prefer your full name with first, middle, and last name or just initials, you have the freedom to choose. You can also explore the pre-formatted text styles provided with the Text option.
Upload: If you've got your handwritten signature image saved on a computer, smartphone, or tablet, you can easily upload the same to complete the e-signature process.
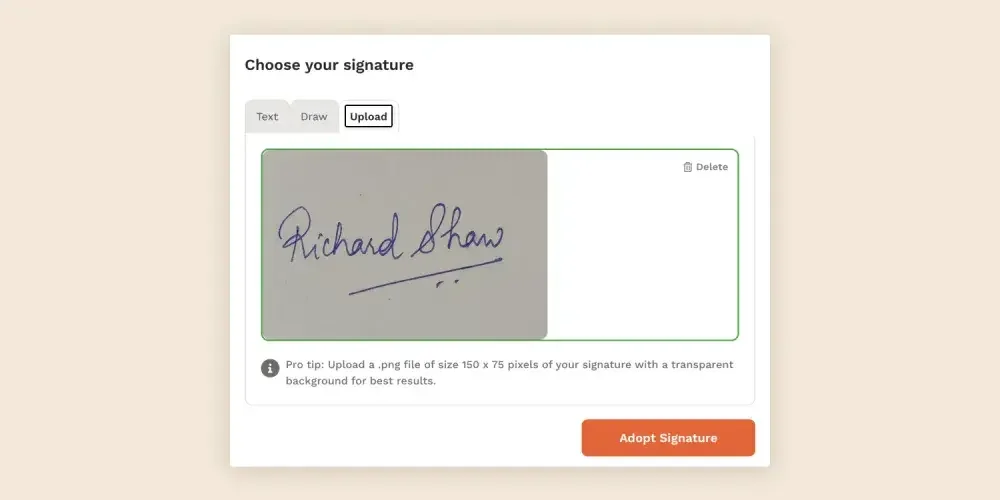
Pick one of the signature styles, then click the Adopt Signature button. Your desired handwritten style will be automatically placed on the signature field.
6. Complete the signing process
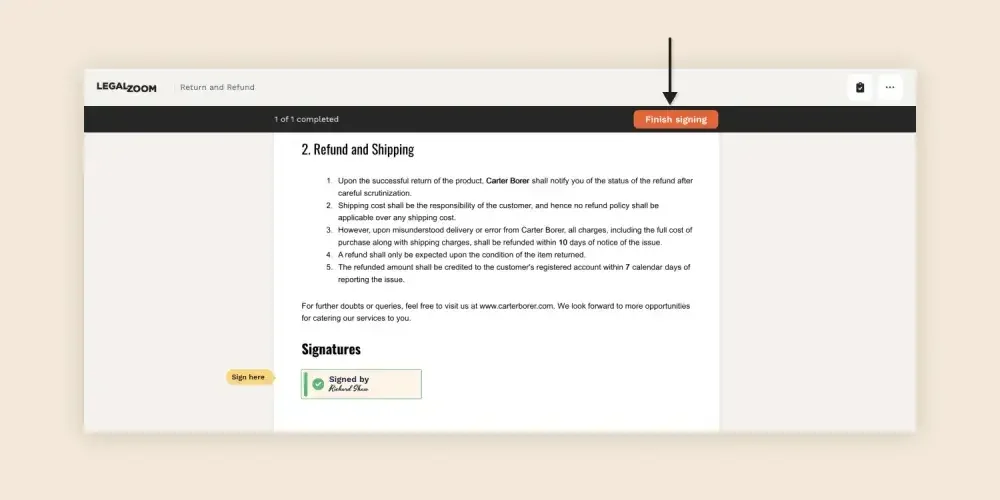
Finally, to complete the e-signing process, you need to click the Finish signing button. A pop-up window will appear, confirming the completion of the e-signature.
Yes, you read right!
Our eSignature service generates an audit trail for all eSigned documents. It is called an eSignature Evidence Summary that chronologically records every action taken on the document during the signing process. It includes details like:
- Envelope ID unique to each eSignature process
- Signer(s) name and email
- IP address of the device used to electronically sign the document
- Date and time stamp for each action taken on the document
You can download both your signed document and eSignature Evidence Summary for any future use.
LegalZoom eSignature service provides you with the best of both worlds—the personal touch of a handwritten signature and the modern nuances of an electronic signature. The goal, however, stays the same: to empower you with an effective signing solution for your individual and business needs.

