
PDF documents form a crucial chunk of the digital documents you might handle every day at work. There are instances where you'll need to electronically sign these PDFs on your own. Luckily, with LegalZoom's eSignature service, this task becomes a breeze. With our user-friendly platform, you can sign your PDF documents digitally in a few clicks, in your preferred signature style.
Self-sign your PDF documents in three easy steps
Experience the freedom and flexibility of signing your PDF documents anywhere and anytime with LegalZoom’s eSignature service.
Follow the steps:
1. Upload your PDF document
To begin the process, sign in to your account. If you don’t have an account, creating one is a piece of cake! Just enter your email address, set your password, and you'll be ready to go. Once you sign in, from the left navigation bar, select the Documents tab and then click eSignature under it.
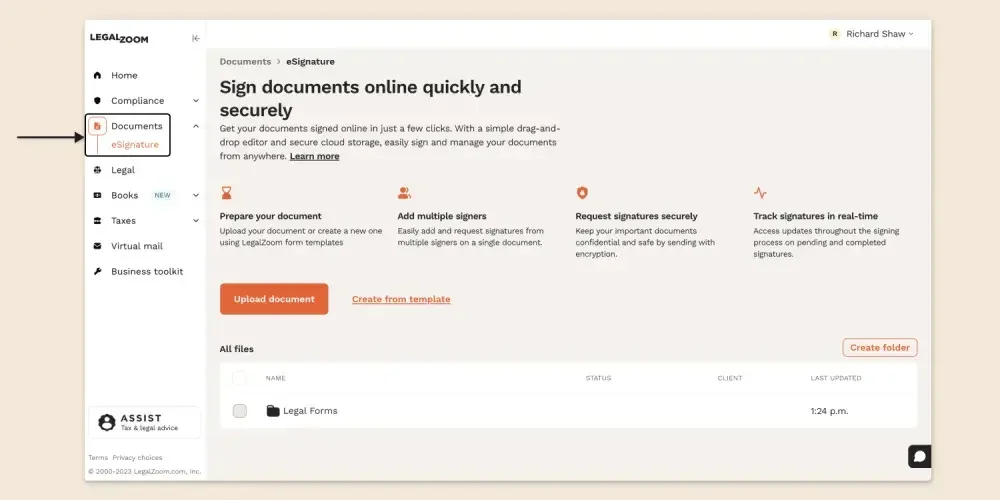
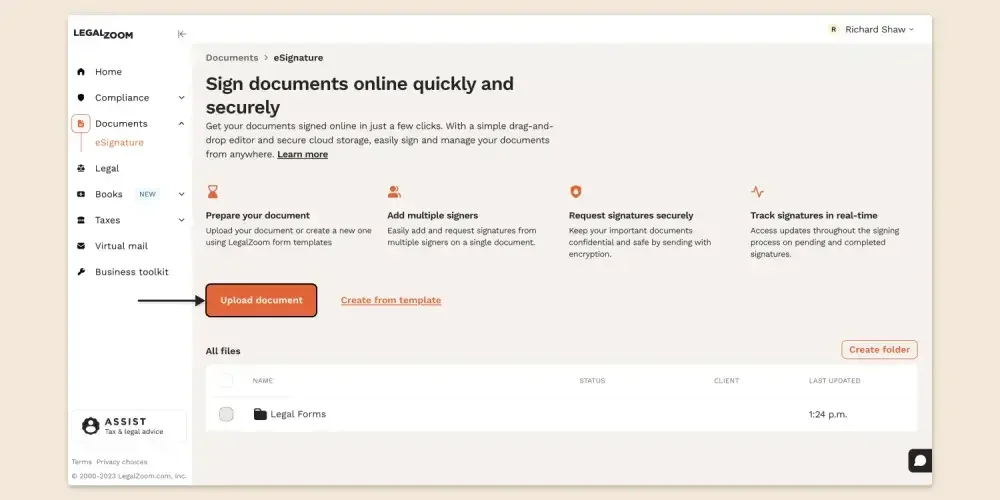
Next, upload the .pdf document you want to sign by clicking the Upload document button.
2. Proceed to add signer tags
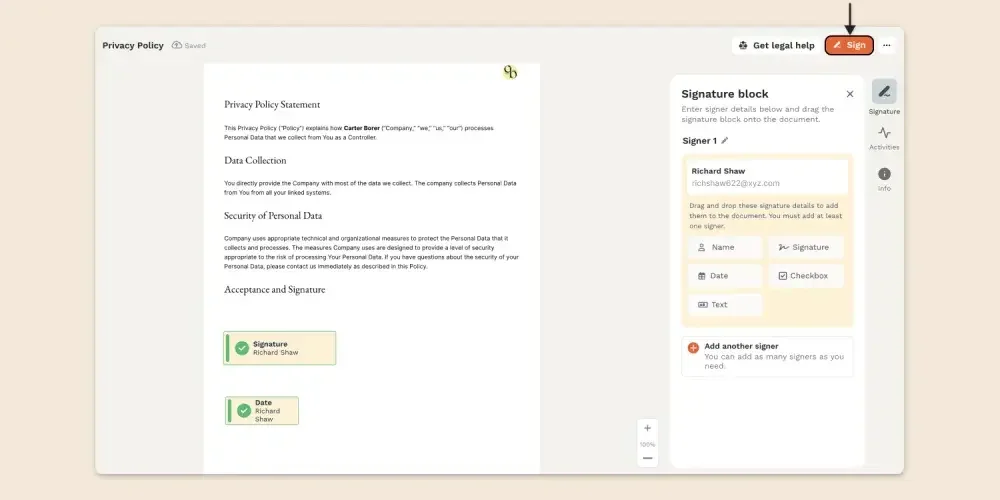
On the right side of the page, you’ll see the Signature block with various tags. To simplify the self-signing process, the default settings pre-populate the first Signature block with the LegalZoom account owner’s name and email ID. You’ll find your name and email ID have already been added to the Signature block.
Note: In case you are not required as the signer and want to request signatures from others, then delete the Signature block assigned to you and add your needed signers to the document. To learn more, check this self-help guide on how you can assign different signers to your document.
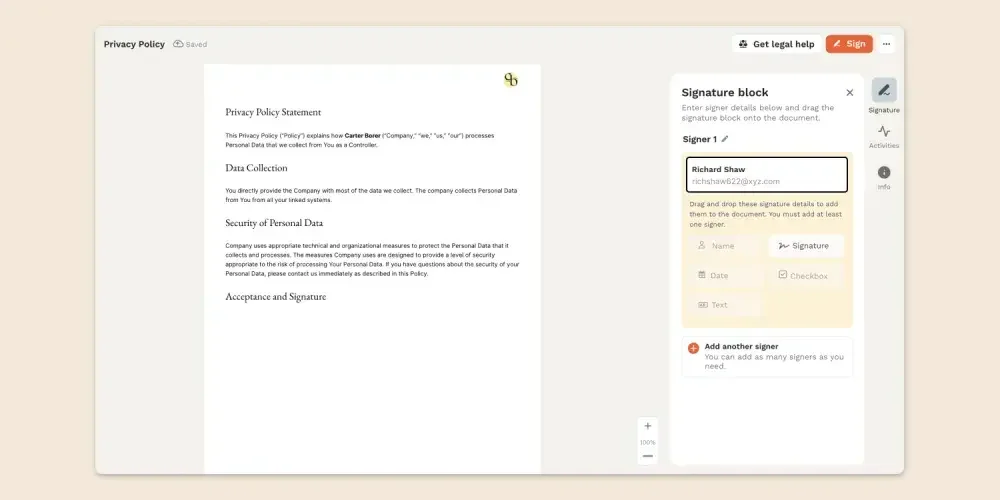
Signature: This tag helps you to place a signature field in your .pdf. You must add this to activate the remaining four tags.
Name: Use this tag if you need to place your name in the .pdf file.
Date: Along with your signature, it’s good to have a record of when you’ve signed your document. With this tag, you can have the date documented along with your signature.
Text: Use this tag to add any information to the .pdf while signing. With the help of the Label field, you can name each Text tag present in the document.
For instance, when you need to include additional details such as a title, contact address, email, and more, simply use Text tags wherever you want to insert this information within the document. A Text tag is something similar to form fields. Form fields are like blank spaces in a digital document where you can type or select information, just like filling out a form on a computer.
Checkbox: This tag can be used when you want to provide multiple selections from a list of options or to indicate your agreement or consent to specific terms in your document. For instance, if you want the terms and conditions of the document to be acknowledged, you can add the checkbox with a “yes” or “no” label.
Drag and drop these tags at the desired places on the document.
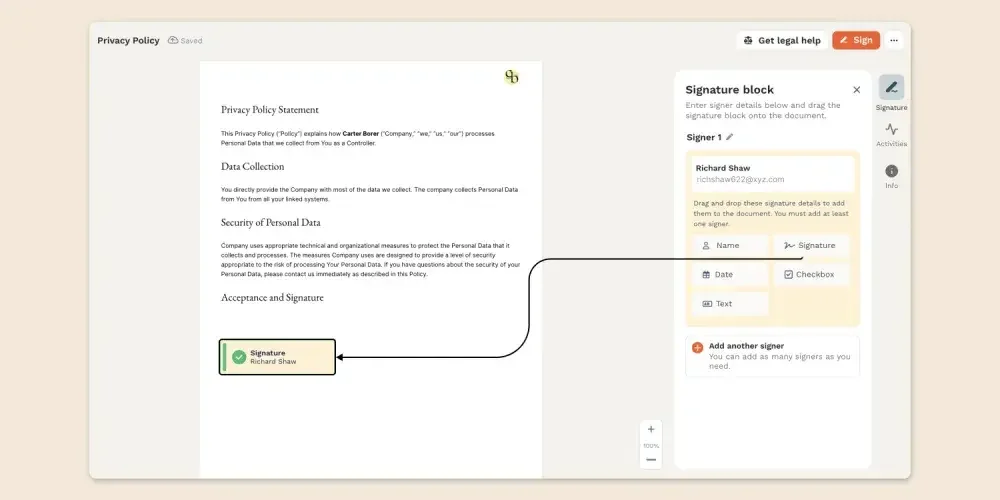
3. Sign documents with your electronic signature
Click the Sign button placed on the top right side of the page to start your self-signing process.
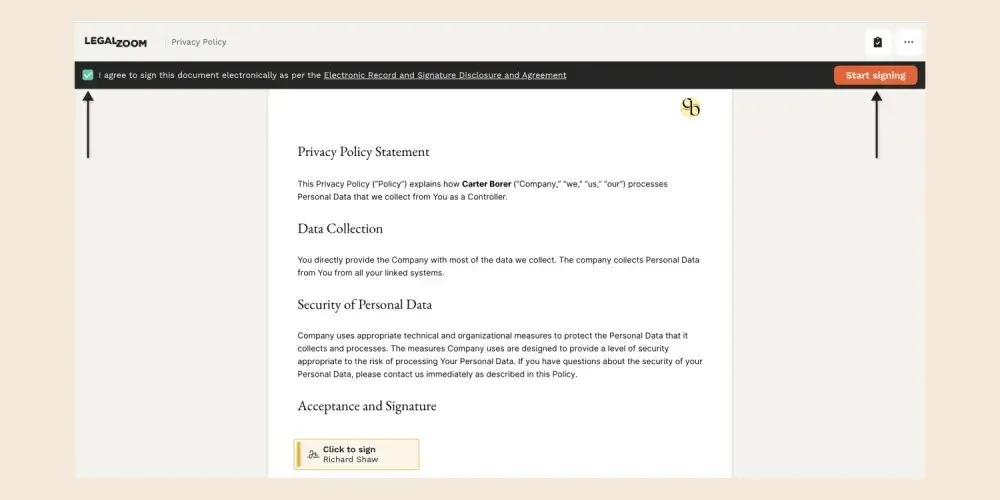
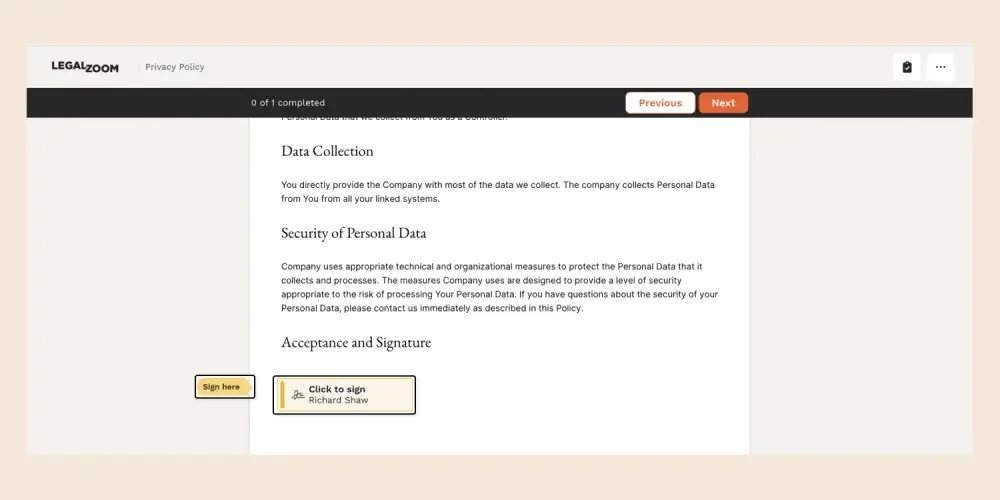
You’ll be directly taken to the signature field, indicated by the Sign here label. Hit the Click to sign button to choose your preferred signature style.
With our eSignature service, you can easily type your name, draw your signature with a mouse, stylus, or finger, and even upload your handwritten signature image.
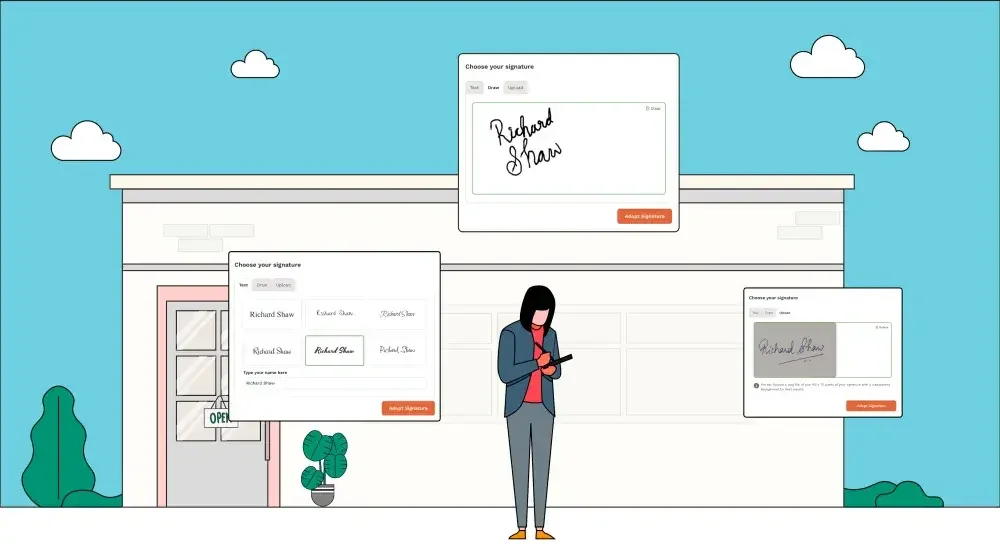
After selecting the preferred style, click the Adopt Signature button. Your unique-looking signature will be placed on the field.
Finally, to complete the self-sign process, click the Finish signing button.
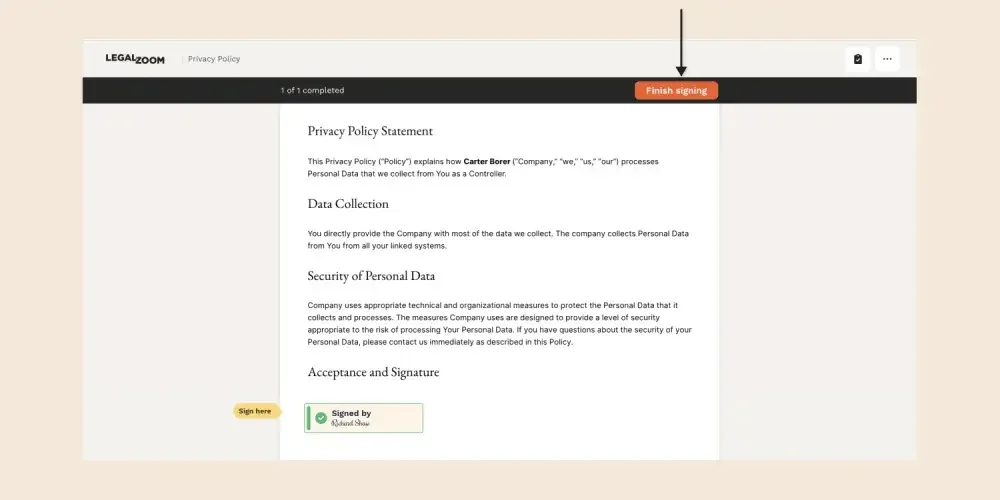
After you complete the signing, from the same window, you can download your self-signed document. Click the Download button placed on the top-right side corner of the page and save it for future use.
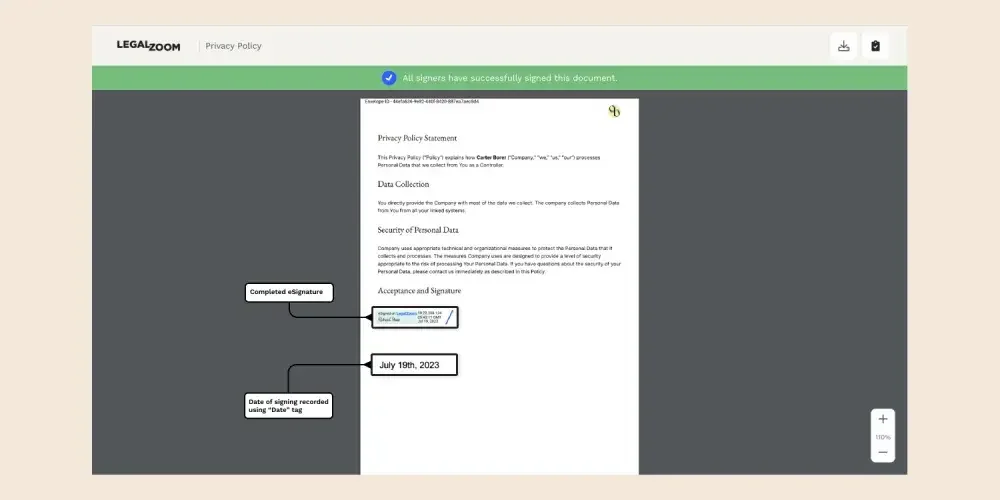
In addition, we send a copy of the signed pdf, eSignature Evidence Summary, and ERSD (Electronic Record and Signature Disclosure and Agreement to do Business Electronically) to your registered email address.
LegalZoom understands the importance of having a simple and efficient self-signing process that will aid you in enhancing your productivity. Our solution is tailored to meet your individual or business needs, ensuring that signing documents yourself is no longer a time-consuming exercise.
FAQs
How do I self-sign a document?
To self-sign a document, you can use the LegalZoom eSignature service. Sign in to your account, and go to the eSignature tab. Upload the document you want to sign yourself. Add a Signature tag and proceed to electronically sign the document.
How do I sign a PDF without the Adobe Acrobat application?
To sign a PDF without Adobe Acrobat, you can use alternative software or online tools specifically designed for PDF signing. For example, you can use LegalZoom eSignature service that comes with a user-friendly interface where you can upload your document and sign it electronically along with the option to create your signature in your style.

